The Groove -2023/24
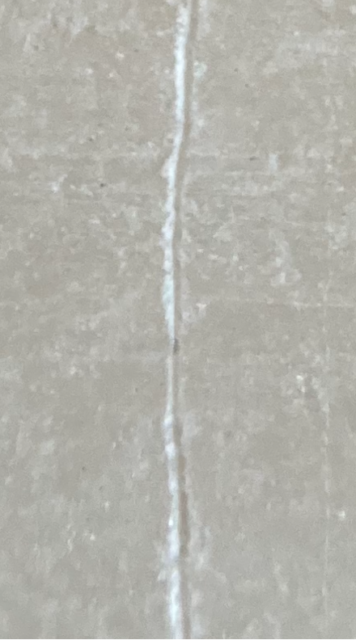
photo – Henry Bainbridge
Material processes describing the development of Stone Turntable R&D – 1
The Idea
Between the 2023 – 2024, I undertook to create a situation where seismic data could be written into rock. Could this be done? The sound recorded from seismometers in Bristol picking up earth activity from Indonesia, would be written or etched into the rock itself.
I was motivated to work with material that would last longer than a human lifetime, or perhaps humankind. This time scale fitted into the time frame suggested by the description of Geological time. Geological time being the span of time the earth was formed till the earth would die out.
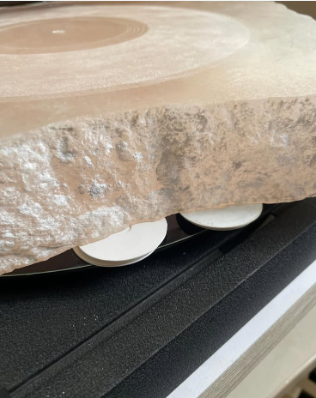
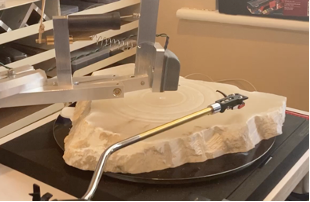
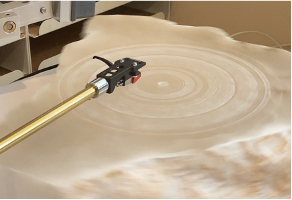
I will cut to the chase – so here is the gypsum alabaster rock cut expertly like vinyl, by Henry Bainbridge at Dubstudio in Bristol.
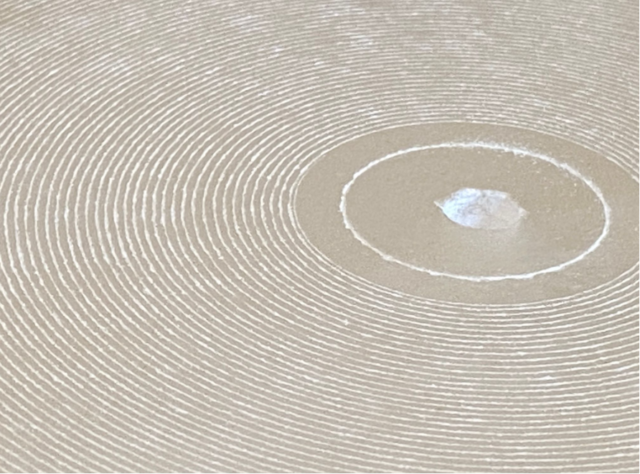
Photo Henry Bainbridge
Listen here: https://soundcloud.com/shirley-896949324/rock-record-in-gypsum-alabaster 🎧
The Process – and how we got there
The description below shows:
1. bespoke equipment and micro engineering
2. finding what type of rock to cut -finding the rock
3. finding a cutting head
4. centring the disc & creating the gears to slow the travelling of the cutting head across the disc
5. testing the stylus on the gypsum
6. creating the arm to hold the cutting head
7. balancing the arm so its neither too heavy or to light to cut
8. first cut – what problems
9. adjusting balancing and weighting the head to cut
10.using a recognisable music track to hear how much level to input the recording
11.counteracting skating tendencies
12. levelling of the disc
13. writing into the disc from the inside outwards
1.Bespoke equipment and micro engineering
To cut the gypsum/ alabaster, bespoke equipment needed to be made, as the equipment for the studios’ vinyl cutting would not be appropriate and may get damaged. This was an exploration for Henry Bainbridge (referred to as HB), and he made the different bespoke pieces of the equipment for the task, as he went along and saw what was needed for the unprocessed natural rock.
I had not experienced micro engineering of this sort before. Some measuring was done under the microscope to a thousandth of an inch. With his experience of cutting vinyl tracks HB could see by eye and sometimes with a magnifying tool when there was a problem cutting this low frequency sound with its correspondingly large wave shape into the irregular material. New to me when dealing with a micro scale of measurements, was the interesting balance of both experienced eye and precisions tools.
The process of cutting vinyl seemingly familiar to me became more and more extraordinary as I got to know more of the details of how the equipment and process worked. HB said himself that even after 20 years cutting, he found that the way sound waves cut in vinyl creating such detailed music had an element of magic about it!
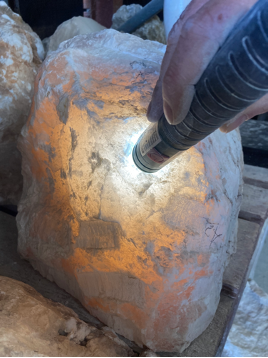
2.Finding the rock
I was able to find out from HB what sort of material would deal with a stylus and a cutting head to cut rock. The cutter would need a material that “wasn’t rough or flaky and that allowed the cutter to glide” through the grooves that were being cut.
Having read that copper was once a material that was used for cutting sound and looking up its official ‘hardness’ or ‘moh’ (3moh). I then was on a path to finding a rock of similar hardness and qualities required. I looked at alabaster gypsum (1.5 – 2moh). This led me to Southern Stone Ltd, Dorset, the company run by sculptor and stone supplier, Tim York.
The Mohs hardness scale is from 1-10 with 1 being the softest: 1 Talc, 2 Gypsum, 3 Calcite, 4 Fluorite, 5 Apatite, 6 Orthoclase feldspar, 7 Quartz, 8 Topaz, 9 Corundum, 10, Diamond
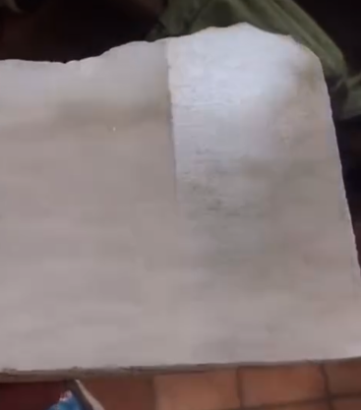
I found that the gypsum alabaster was imported from Zaragoza in Spain from the Ebro river area. https://www.mindat.org/loc-106023.html
This rock was historically used in art and architecture and the properties and behaviours of which are well known and documented. These deposits were formed in the Miocene Epoch between 13.8 and 23 million years ago).
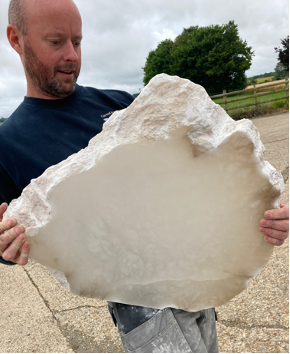
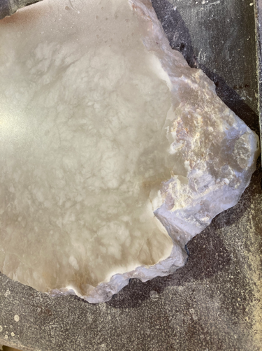
Left 24kg gypsum alabaster carried by sculptor and stone mason Tim York
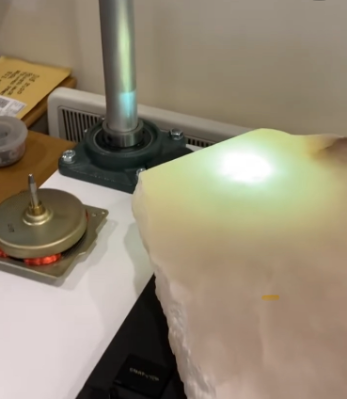
Mid Torchlight showing translucent properties of the gypsum
Right Gypsum alabaster showing the veins of the rock interior
Material processes leading to the cut
3. Finding a cutting head
The head itself, a presto cutting head, came from older equipment that had previously been used for recording long large discs for radio programmes before there was internet to stream radio programmes station to station. It was a solid looking piece of equipment that we hoped would take the strain of larger wave patterns cutting into the rock without creating overheating in the internal wiring connections.

Left the presto cutting head
Right the cutting head used for commercial vinyl cutting
See the Presto cutting head
Watch here: https://vimeo.com/1071395417
I was shown the inside of a cutting head. HB said, “To record into a vinyl disc the cutting head has two channels, two cables, left and right, that make the stylus move properly. There’s loads of moving parts including the drive coil itself that connects to the linkages. They all vibrate and what you are trying to do is get as little vibration of the object (the cutting head) and the most vibration from the information (the music). This information travels through these linkages from the drive coil to the stylus and that’s what you want to pick up, but inevitable other bits are going to vibrate, and then they create harmonics of the signal. Each cutting head has its own harmonic signature to do with all the other bits in it. When you were describing how sound travels differently through different parts of the planet it’s a similar sort of thing…….”
Internal connections in a cutting head
Watch here: https://vimeo.com/1071396960
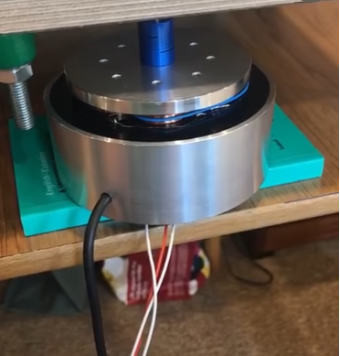
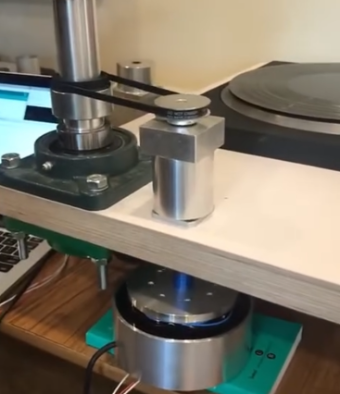
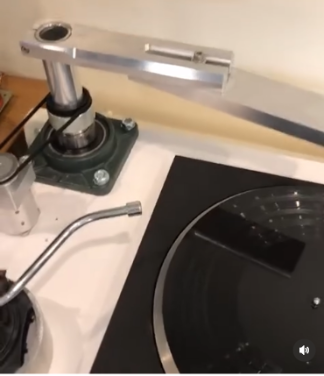
4. Centring the disc and creating the gears to slow the travelling of the cutting head across the disc

Left The technics SP 20 turntable coping with the weight of the 14 kilo rose gypsum alabaster. As long as the rock was balanced with the centre as centred as it could be, then the motor could manage to turn
Right The 2 way motor with the universal gearing to rotate the stand for the cutting arm to travel slowly across the disc as it cuts. The cutting arm will be on the metal pole to elevate it as high as it is needed for the thicker than vinyl rock disc..
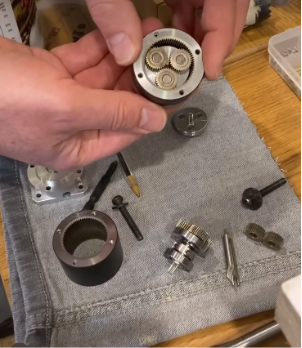
Left The planetary gears set to slow the gearing
Right The motor to move the cutting head very slowly across the disc while cutting
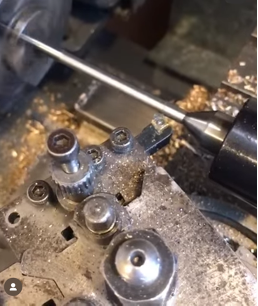
5. Testing the stylus on the gypsum
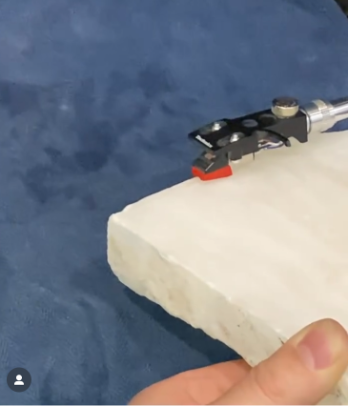
Left – First test cut with a diamond stylus
Right – Experimenting with lacquer on the rock to see if the grip and glide of the cutting stylus is improved. When tested it gave the stylus a sticky type contact with the rock and didn’t help the cutting
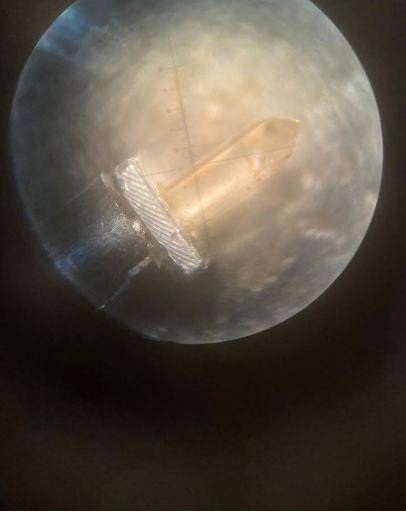
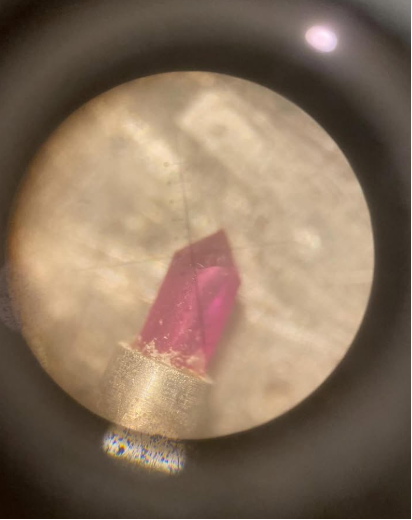
Photo Henry Bainbridge
Magnified diamond and ruby stylus for cutting. Pictures showing the scale
Explanation about the playback stylus tip and how it reads sound
Watch here: https://vimeo.com/1066733277
The transferring of the vibration from an electric cable to a vibrating coil and then into a diamond cutting needle seemed plausible but thinking about how this equates to the detailed sound and music we hear when replayed from the cutting of records – it becomes more and more unbelievable.
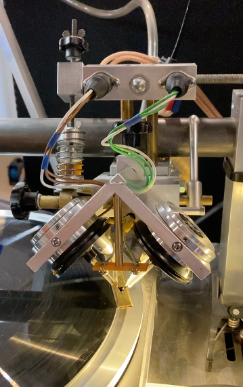
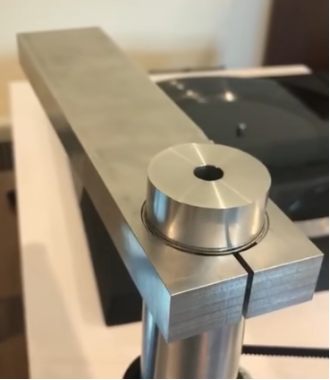
Left Making the bearing shaft where the very finest of calculations needing to be made
Right The motor is linked to the planetary gears via the bearing shaft and then linked to the cutting arm
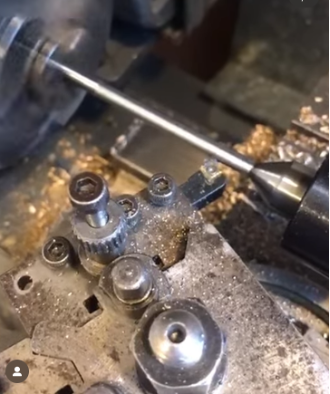
6.Creating the arm to hold the cutting head
The cutting arm needed a bend in it.
Below are the cutting arm refinements for the suspension head. On this will later be fixed the spring, balancer and dash pot – that works as a shock absorber so the head doesn’t bounce when cutting.
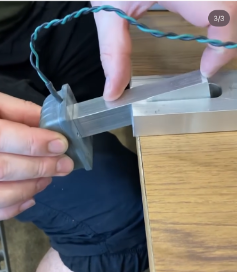
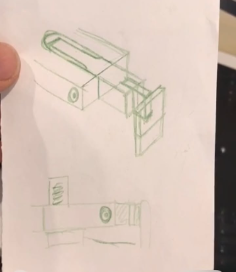
Left The cutting head needs to be mounted at an angle
Right here’s the plan to suspend the cutting head.
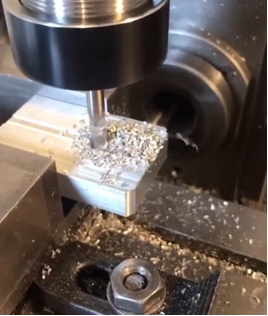
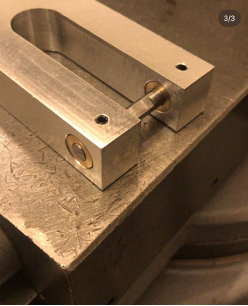
Left Machining the cutting head mounting plate
Mid The metal looking like butter
Right The mounting plate


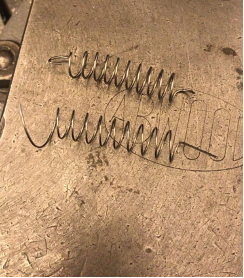
Left The mounted cutting head is connected up. All the angles and weights must be considered. The dashpot or shock absorber (seen here) is attached first across the top. It still needs a spring, so one is made the right tension and length.
Mid & Right Piano wire being curled and made into the spring.
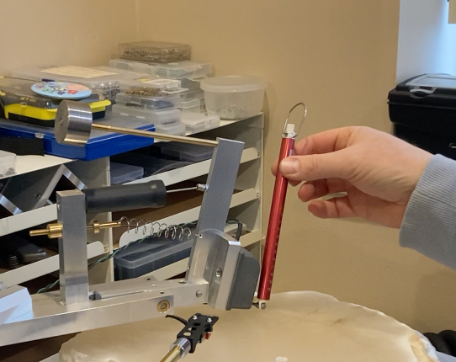
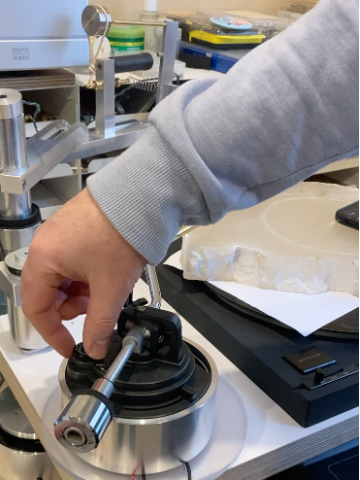
7. Balancing the arm so its neither too heavy or to light to cut
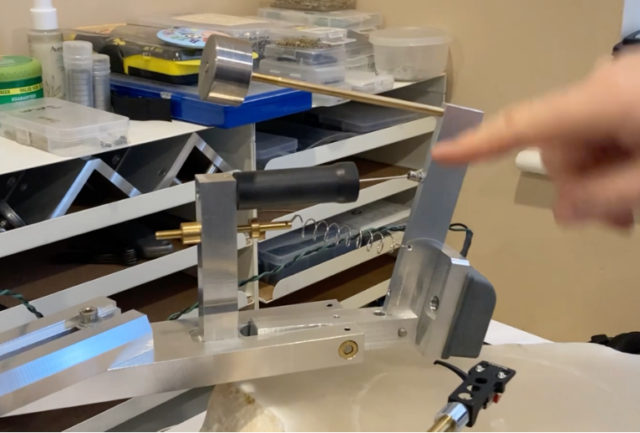
Explaining the balances and weighting
Watch here: https://vimeo.com/1066719359
The First Cut
8. First cut – what problems?
On playback the sound of the crackling gypsum alabaster was overriding and masked any lower frequencies from the recording written into the rock, although we were sure they were there. Our spectogram was unclear and our playback speaker was only a small one. It was clearer later that the recording input level was too low, but more importantly the playing arm would sometimes jump the groove.
Left -The rock is chocked up so it’s as level as it can be
Right – First cut and playback
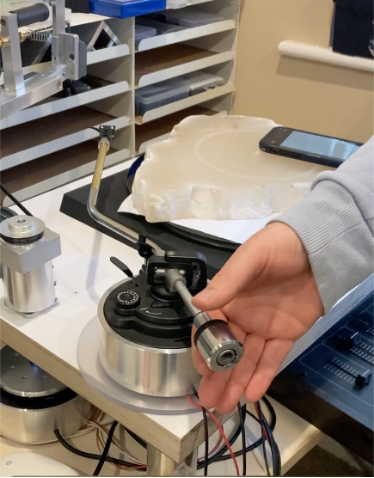
9. Adjusting balancing and weighting the head to cut
The weighting of the cutting head and its pressure on the disc, measured in grams, was key to how the stylus was staying in the rock and not encouraged by the sound vibrations to jump out of its groove. It could be measured with a spring. This would indicate if the spring and balancing top weight should be adjusted.
Adjusting the weight and therefore pressure downwards of the cutting head
10.Using a recognisable music track to hear how much level to input the recording
To get clearer playback with the lower frequencies, we planned to put the level of recorded sound up even-though this might encourage the cutting stylus to jump. Also, we decided to test the system by recording a music track with a pronounced beat rather than our field recording, on to the test rock so we could easily recognise it.
The loop of the Bushman track
The uneven-ness of the rock surface encouraged the cutting stylus to jump. So, the spring, the dash pot and the top balancing weight were adjusted. However, we could hear the bass and the definition of the rhythm of the Bushman track which played in a loop – Hurray!
11.Counteracting skating tendencies
To counteract the tone arm stylus jumping from the track, either having a tendency to jump backwards (looping) or jumping forwards, the tone arm could be balanced to counteract these tendencies by adjusting the anti-skating knob.
Anti skating adjustment and balancing horizontally for the playing tone arm
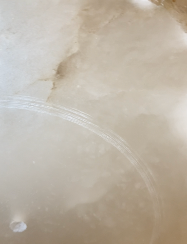
12. Levelling of the disc
We could see still that any slight uneven-ness of the disc surface encouraged jumping.
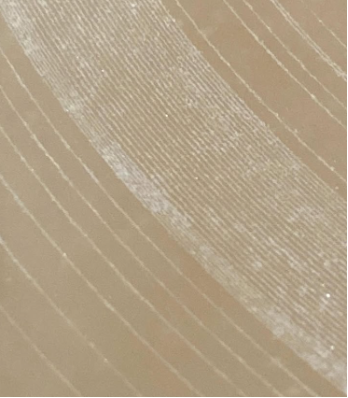
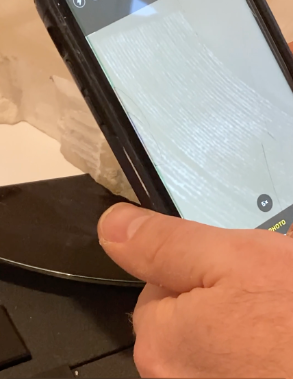
Magnifying the track, we can see the grooves are getting bigger/deeper with the lower frequencies in the seismic field recording.
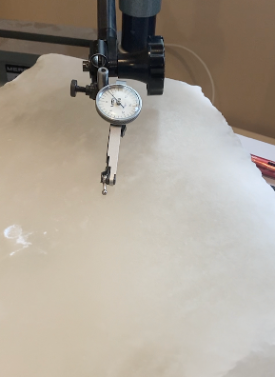
Left looking to see where the track is uneven
Right this gadget showed surface unevenness
Looking for low frequency groove shapes in the track
Watch here: https://vimeo.com/1071400745
13. Writing into the disc from the inside outwards.
The balances are as good as they can be but there is still jumping when cutting. The best cut was a test in the centre of the disc where the speed of the turning disc was slowest and disrupted the stylus the least. Also, we thought it was the surface of the rock rather than the weighting creating the jumping of the stylus.
As the needle was travelling faster on the outer rim of the disc it was more likely to jump than near the middle of the disc. So, we cut from the middle outwards to maximise the slowest speed of the disc and the flattest surface to cut into.
Left Inside out cutting
Mid Inside out playing back tests starting in the middle.
Right Instructions to play ‘outside in or inside out.’ Before the industry standardised cutting from the rim inwards, records were recorded on both systems.
Recording from mid disc outwards
Watch here: https://vimeo.com/1071426144
The Final Cut

Here are the tracks cut to minimise jumping and play smoothly. The digital version here is mixed to emphasise the lower frequencies slightly, but the sound of the rock itself in a higher frequency is part of its mix and beauty
https://soundcloud.com/shirley-896949324/rock-record-in-gypsum-alabaster 🎧
This project’s full title Geological Time and Stone Turntable R&D. Other parts of this R&D can be seen here on this website called Sonic Rock Interactions, The Lizard is a lizard, Skin and Ice and Flags on the beach.
End